Configuring QnA Maker Settings
Users need to connect to their custom question-answering project to use KM capabilities. This section will describe how this configuration can be done in detail.
Prerequisites
- User has an active and usable Microsoft Language Studio account.
- User has access to create or modify a custom question-answering project.
- User has an active and published (either Staging or Production) custom question-answering project.
To add QnA Maker settings to the newly created KM project, a user must follow the following steps:
-
Click on the Menu (
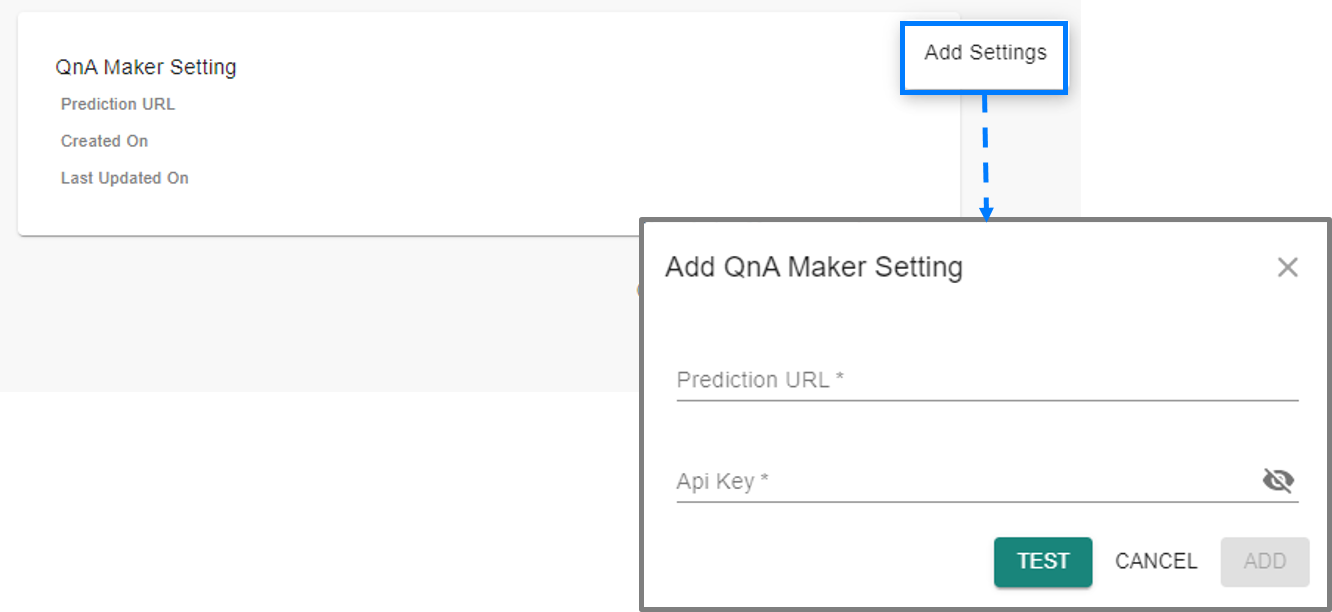
 ) icon in the top right corner of the QnA Maker Setting and then click "Add Settings" which will open a dialog allowing the user to enter the required settings as shown below:
-
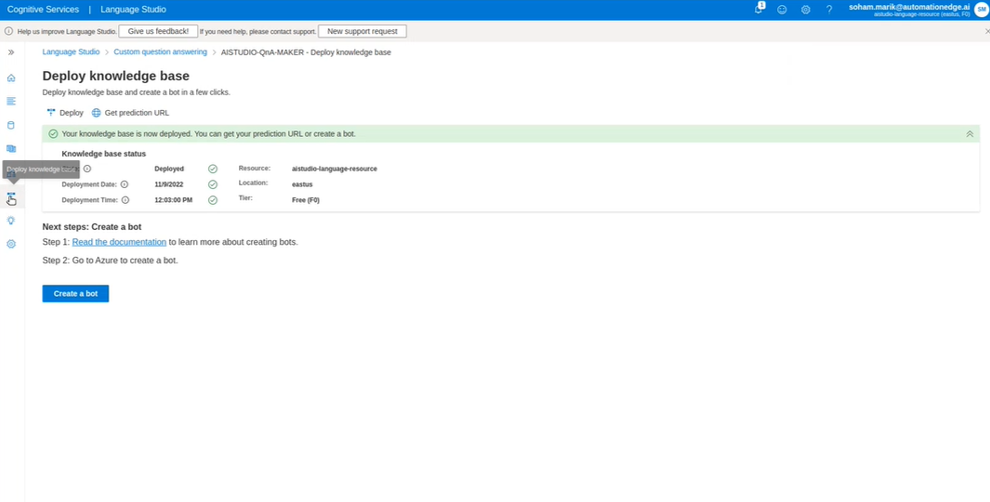
The user's Language Studio portal can be used to get all the necessary values by opening the necessary custom question-answering project, and then by selecting the Deploy Knowledge Base section. If the project isn't already deployed, click "Deploy" to deploy it. Click "Get prediction URL".
-
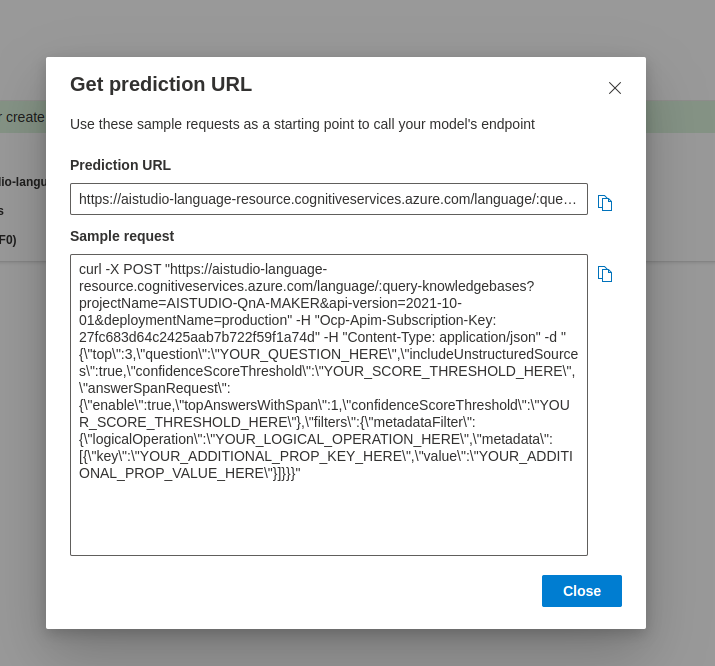
Click the Copy icon to copy the Prediction URL. The Ocp-Apim-Subscription-Key is considered as an API key for QnA Maker. Select the key to copy the API key.
-
Once the users had added all the values in the Add Setting dialog, they can test these settings by clicking the Test button and then save these settings by clicking the Add button.
-
Clicking the Add button will fetch the required details from the Custom question-answering project and populate the required data in the user’s KM project. On the bottom left of the user's screen, a success message reading "QnAMakerSettings created successfully!" should be displayed in green. In case of any issue, a failure message would be displayed in red. (For more details, see the Troubleshooting section.)
-
Users can follow simple steps to check if their AIStudio instance has been connected to their Custom question-answering project as intended:
Navigate to the KA Search sub-menu and try searching for some information. If the users are getting expected QnA pairs on the screen, then the QnA Maker configuration is successfully completed.